
The filter narrows the reports to a specific subset. It works the same way in the list, map and gallery views.
Open the filter
Click Filter reports in the top bar. On a small screen the button is called Filter. The filter opens on the left side of the page.
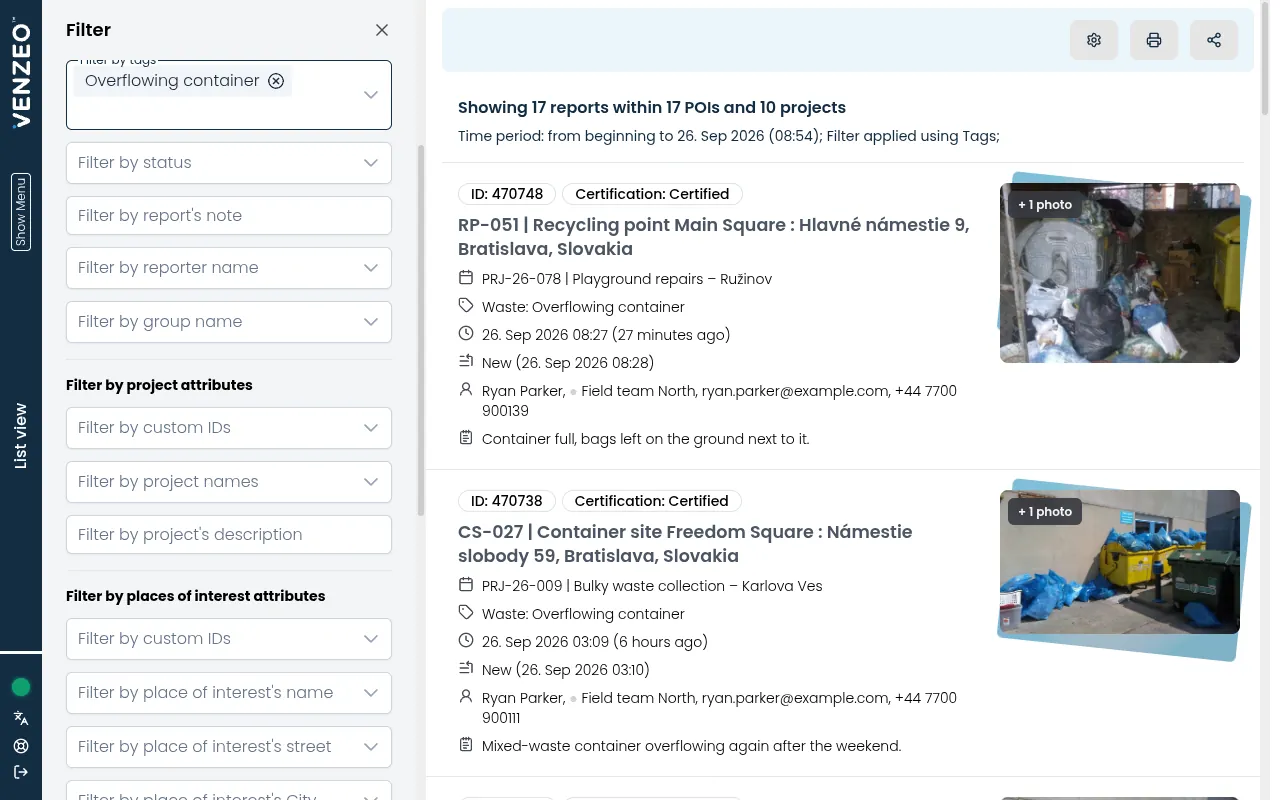
Set the filter
The results update as you change the filter. The filter has these parts:
- Filter by time period: for example Today, Last 7 days, This month, All time, or Custom for your own dates.
- Filter by report attributes:
- Filter by report ID: one or more report numbers, separated by commas.
- Filter by tags (previously called types).
- Filter by status.
- Filter by address.
- Filter by report’s note: text the reporter wrote in the report.
- Filter by reporter name.
- Filter by group name: only if your organization uses groups.
- Filter by places of interest attributes, Filter by project attributes, Filter by asset attributes and Filter by task attributes: only if your organization uses these features.
When you are done, click Apply filter to close the filter panel.
Save a filter you use often
- Set the filter.
- Click Save filter.
- Fill in Name of this filter and save it.
Your saved filters appear at the top of the filter under Saved Filters. Click one to use it again.
Change or clear the filter
While a filter is active, the top bar shows Update Filter and Clear Filter. Click Update Filter to change it, or Clear Filter to show all reports again.
Tip: Always check the filter before you export or share reports. Everything the filter shows goes into the export. See Exporting filtered reports.