
Only administrators can edit users.
Change a user’s details
- Open the main menu, expand Users and choose Manage users.
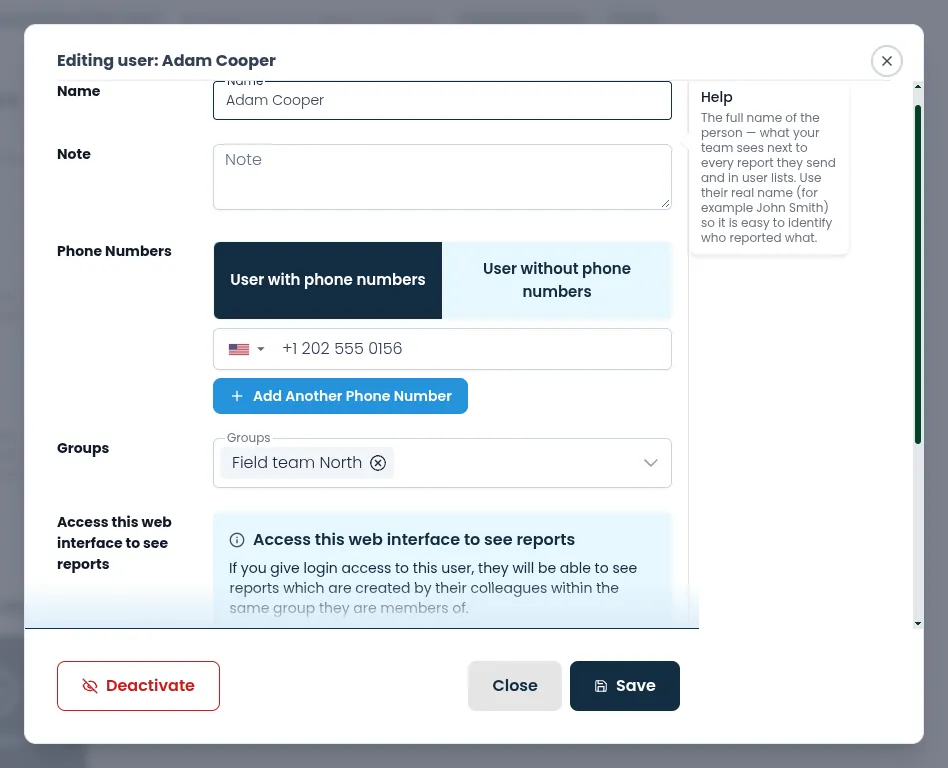
- Find the user in the table and click Edit in their row. The Editing user pop-up opens.
- Change what you need: Name, Note, Phone Numbers, Groups, Email or Access administrator area.
- Click Save. The pop-up closes and the message “Successfully saved” appears.
When you give someone login access for the first time, or change their email address, Venzeo™ sends them a new invitation email.
Take away someone’s web access
- Open the main menu, expand Users and choose Manage users.
- Click Edit in the user’s row.
- Under Access this web interface to see reports, choose No login access.
Warning: Saving removes the person’s email address and admin rights from their profile. To give access back, you must enter them again.
- Click Save. The message “Successfully saved” appears.
The person can no longer log in to the web interface, but can still own a device with the Venzeo™ mobile app.
Deactivate a user
Deactivate people who have left your organisation. Reports they created stay in Venzeo™.
- Open the main menu, expand Users and choose Manage users.
- Click Edit in the user’s row.
- Click Deactivate. The question “Do you really want to deactivate this user?” appears.
Warning: Deactivating removes the user’s login access, email address and phone numbers. Reactivating does not bring them back.
- Click Deactivate again to confirm. The message “User has been successfully deactivated” appears and the user disappears from the table.
The released phone numbers can be given to someone else. The user who created your organisation’s account cannot be deactivated: their pop-up shows “This user cannot be deactivated.” instead of the Deactivate button.
Reactivate a user
- Open the main menu, expand Users and choose Manage users.
- Turn on Show deactivated users. Deactivated users appear in the table.
- Click Reactivate in the user’s row and confirm. The message “Successfully activated” appears.
To let the person log in or use the mobile app again, add their email, rights and phone numbers as described in “Change a user’s details”.
Adding a new user with exactly the same name also reactivates a deactivated user. See Adding a new user.
Tip: Use the Rights and Login access columns to check at a glance who can log in and who is an administrator.
For what each level of access allows, see User roles. Groups appears only if your organisation uses groups.